I’m not going to talk about what IntelliJ IDEA (just IntelliJ from now on) is or what it does in this post too much since this article is meant to be a guide on how to make your copy of IntelliJ portable.
Step One: Bare Installation
Note: You can skip this step if you already have a copy of IntelliJ. On Windows, simply go to your Program Files directory and copy the IntelliJ IDEA folder (usually C:\Program Files (x86)\JetBrains ) to your pen drive. On UNIX simply copy the whole IntelliJ installation directory.
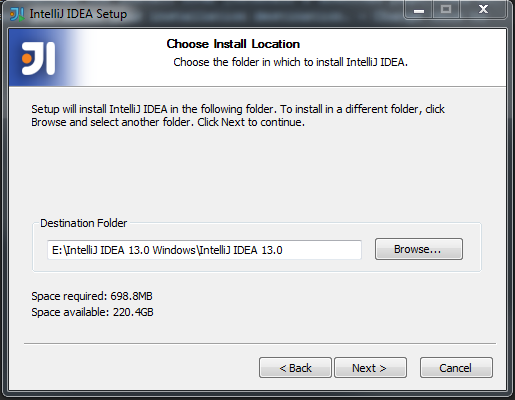
The first step is - kinda obvious - to download the installer from JetBrain’s download page. Execute the installer
as usual until you get to the step where you choose your installation destination. - Change this to a path on your pen drive
and hit next until the installation is done. You might want to disable automatic shortcut creation because they won’t work
unless your pen drive is actually plugged in.
Installation on UNIX platforms is quite a bit easier since all you need to do is extract the archive you downloaded.
Don’t start IntelliJ yet. We have to modify some configuration files first. …well, we have to modify one configuration file.
Step Two: Modifying Where IntelliJ Stores Your Personal Data
This basically is the step where we make IntelliJ “portable”. Go to the directory where you installed IntelliJ. Browse to <InstallDirectory>/bin and open the file idea.properties. Make sure you don’t use Windows’ integrated notepad editor. (As a side note: A really good text editor on Windows is Notepad++.)
The head of your file should look something like this:
#---------------------------------------------------------------------
# Uncomment this option if you want to customize path to IDE config folder. Make sure you're using forward slashes.
#---------------------------------------------------------------------
# idea.config.path=${user.home}/.IntelliJIdea/config

#---------------------------------------------------------------------
# Uncomment this option if you want to customize path to IDE system folder. Make sure you're using forward slashes.
#---------------------------------------------------------------------
# idea.system.path=${user.home}/.IntelliJIdea/system
These are the settings we care about. They define several paths IntelliJ looks for or saves files to. We basically want to uncomment and change all of them.
A comment at the top of the file suggests that we can use ${idea.home} to specify a location relative to IntelliJ’s installation path. - Let’s do it! ;D
First, uncomment the options like this (note: I will omit unnecessary lines from now on):
idea.config.path=${user.home}/.IntelliJIdea/config
idea.system.path=${user.home}/.IntelliJIdea/system
idea.plugins.path=${idea.config.path}/plugins
idea.log.path=${idea.system.path}/log
Next, we will go and change the paths to where we want IntelliJ to store user specific files (mostly configurations, plugins and logs). I want to have a separate var directory in my installation directory where the IDE should store these files. - Simple!
Change the config options like this:
idea.config.path=${idea.home}/var/config
idea.system.path=${idea.home}/var/system
idea.plugins.path=${idea.config.path}/plugins
idea.log.path=${idea.system.path}/log
The only important thing is that you specify your paths relative to ${idea.home}. Everything else doesn’t really matter. If we start IntelliJ now, it will probably start by asking whether we want to import settings from another version of IntelliJ. After importing old settings (or not) we get to the welcome screen. The only thing left to do now is adding a portable Java SDK.
Step Three: Setting up the JDK
Again, we start by downloading a JDK from its download page. Continue by installing the JDK as usual. Use the default installation target. - You can, of course, skip the download and installation if you already have a JDK installed.
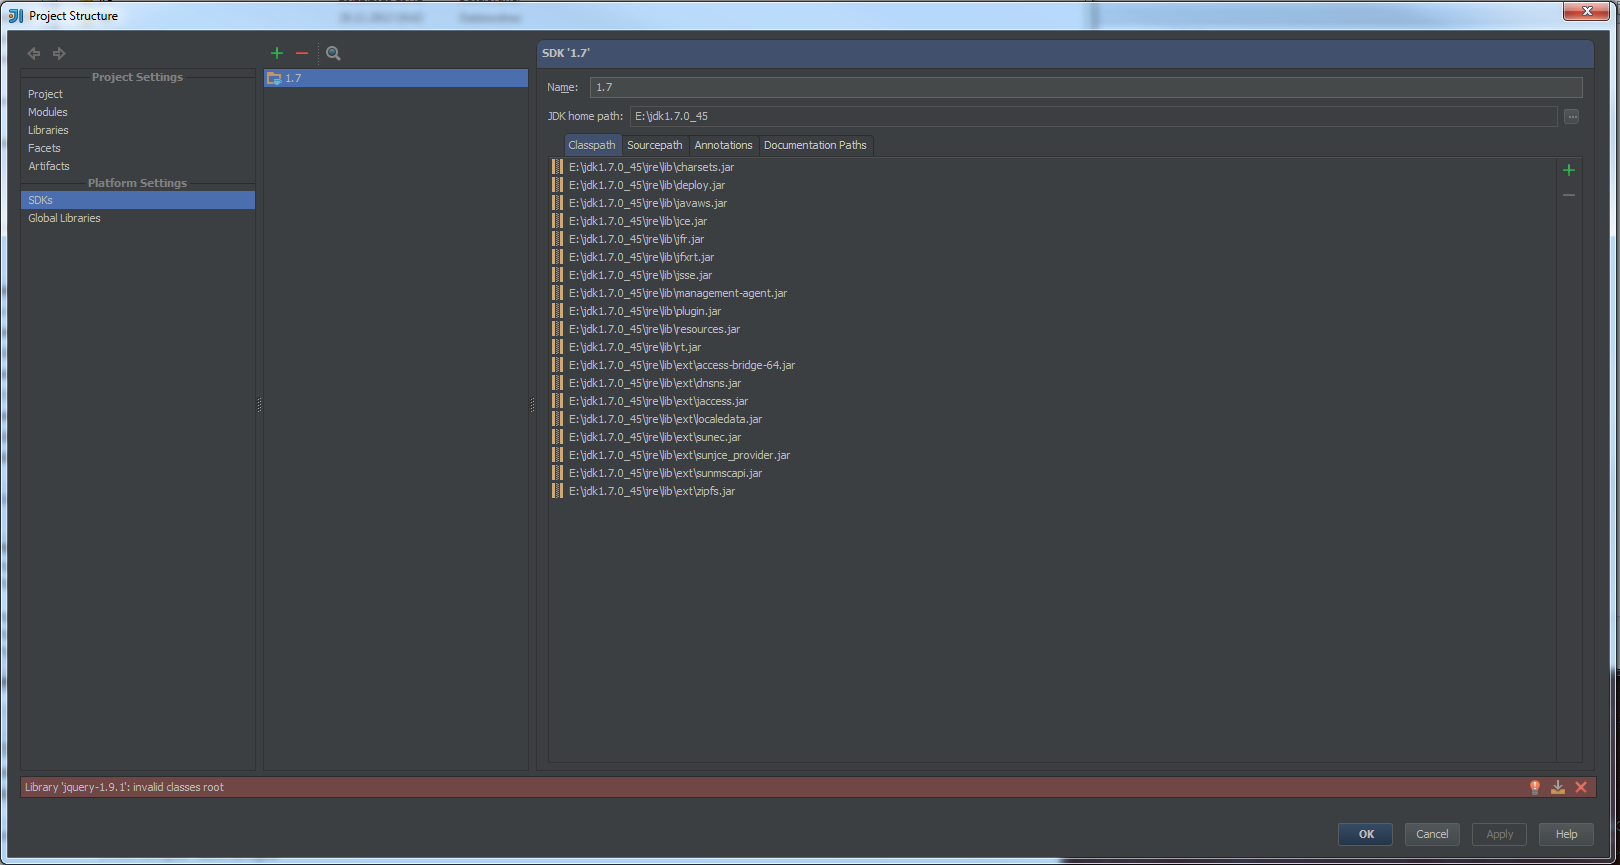
Next, go and find your JDK installation in your Program Files directory. On my system it is: C:\Program Files\Java\jdk1.7.0_45. Copy the JDK folder (jdk1.7.0_45 in my case) to your pen drive and open IntelliJ’s project settings panel. Go to Platform Settings > SDKs and hit the big green plus. Add a JDK and set it’s home path to where you copied your JDK files to.
Aaaand done. Happy coding on the road!